Do you want to add a mortgage calculator in WordPress?
If you have a real estate or finance website, then a mortgage calculator can help visitors see whether they can afford the properties you are promoting. This can keep people on your website for longer and help you sell more properties.
In this article, we will show you how to easily add a mortgage calculator in WordPress.
Why Add a Mortgage Calculator in WordPress?
A mortgage calculator allows users to get estimates for their mortgage payments, with the interest rate and amortization period.
Visitors can simply insert information like their home value, down payment, interest rates, and so on. After that, the mortgage payment calculator will figure out how much they have to pay per month based on the given details.
If you are making a real estate website with IDX property listings, then a mortgage calculator will also help with lead generation. Visitors can use the calculator, but they will have to enter their email address to save their results.
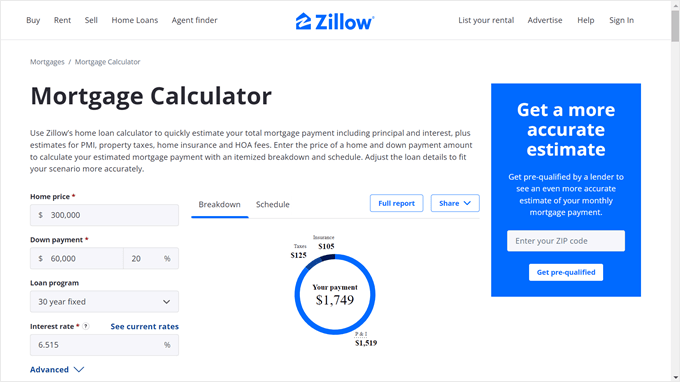
It can also reduce your bounce rate because visitors don’t have to visit a different site to get a mortgage calculation.
Other people who may benefit from a mortgage calculator on their sites are financial advisors, mortgage brokers or banks, and personal finance educators.
That being said, let’s take a look at how to easily create a mortgage calculator in WordPress. This tutorial will show you two beginner-friendly methods with two different mortgage calculator plugins: WPForms and Formidable Forms.
You can use these quick links to skip to a specific plugin:
Method 1: Add a Simple WordPress Mortgage Calculator With WPForms
The first method is to use WPForms. With its 1700+ form templates, this drag-and-drop form plugin is perfect for creating various forms, including a mortgage calculator, for different types of websites.
This method is recommended for people who just want to create a simple yet responsive mortgage calculator without added calculations for taxes or insurance.
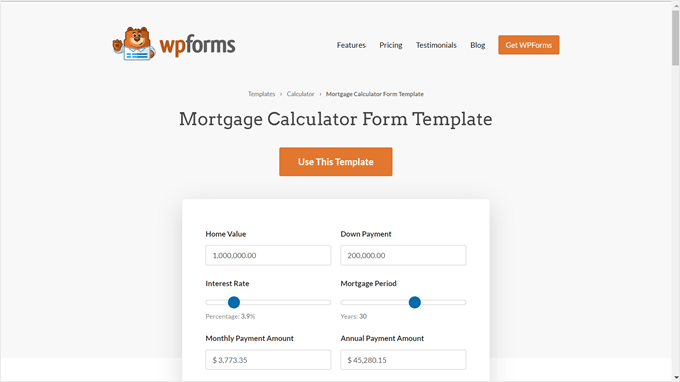
Note: While there is a free version of WPForms, this tutorial will use the Pro plan as that’s where the Calculations addon is available. Here’s a WPForms discount you can use to save 50% off of your purchase!
First things first, go ahead and install the plugin in WordPress.
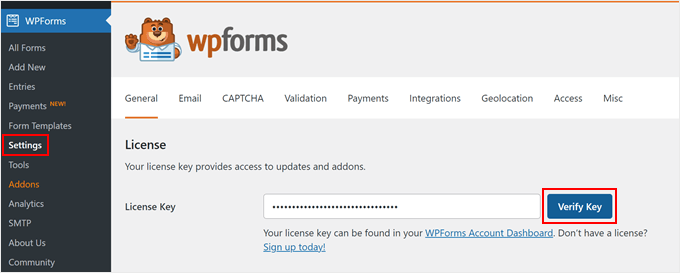
Once done, go to WPForms » Settings and insert your Pro plan’s license key from your WPForms account page. Then, simply click ‘Verify Key.’
Choose and Customize a Mortgage Calculator Form Template
Now that the license key is active, you need to navigate to WPForms » Add New.
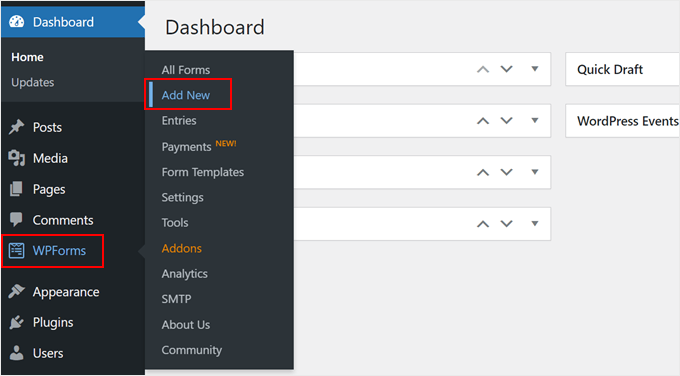
On the next screen, you can give your new form a name. It can be something as simple as ‘Mortgage Calculator Form.’
Scrolling down, use the search bar to find a mortgage calculator form template.

You will see that WPForms has two templates: Mortgage Calculator Form and Simple Mortgage Calculator Form. Both templates provide similar functionality but differ in the specific fields they include.
The Simple Mortgage Calculator Form Template is best for real estate sites that want to help potential buyers quickly estimate their monthly mortgage amount.
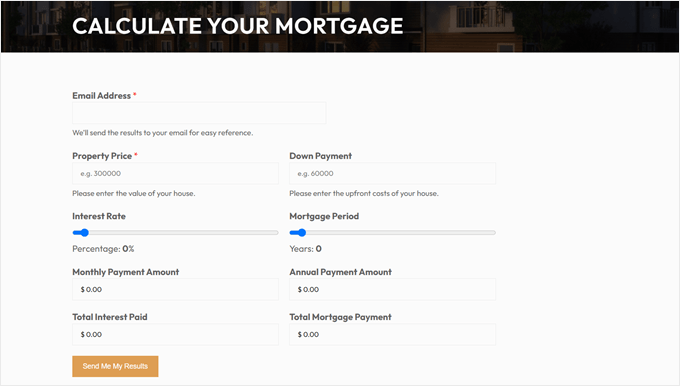
On the other hand, the Mortgage Calculator Form Template provides a comprehensive breakdown of the mortgage details, including total interest paid, total mortgage payment, and annual payment amount. This level of detail can be useful for customers who want to fully understand their financial obligations.
It’s up to you which calculator you’d like to use, but for demonstration purposes, we will use the Mortgage Calculator Form Template.
You can click ‘View Demo’ to see what each form looks like in action.
Once you’ve made your choice, just click ‘Use Template.’
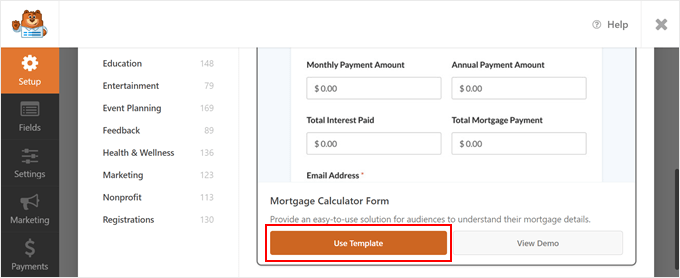
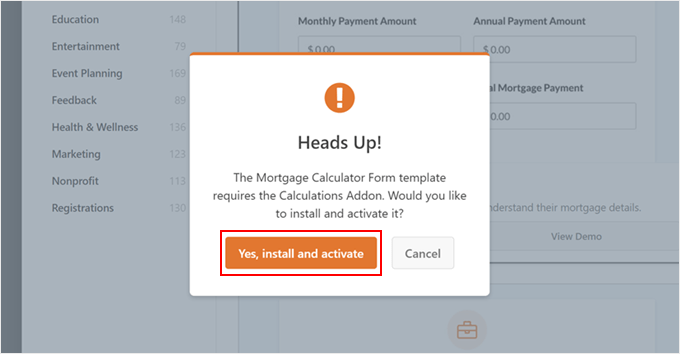
At this stage, a popup will appear saying that the form requires the Calculations addon.
Just click ‘Yes, install and activate’ to continue.
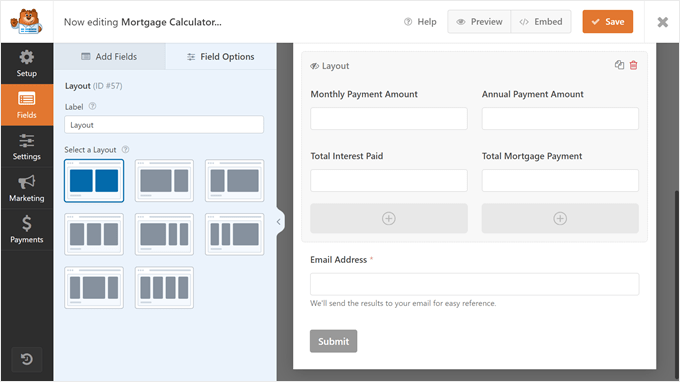
You will now arrive at the drag-and-drop form builder. As you can see, the template already has the calculator fields added for you.
This particular template has fields for users to enter their home value (total cost of the house) and their down payment amount (how much the buyer pays upfront when purchasing a property).

Users can also use the sliders to enter information about their home loan interest rate and mortgage term.
Once the form has all of the mortgage details, the bottom section will automatically calculate the user’s mortgage monthly and annual payment amount, total interest paid, and total mortgage payment.
You can find the calculation formula for this bottom section by going to ‘Field Options’ and navigating to the ‘Advanced’ tab in the left-hand panel. At the bottom, you will find the ‘Formula’ box.
We recommend not making changes to this section unless you are confident in doing so. That said, WPForms has a Calculations cheat sheet you can use if you need help.

Let’s go ahead and customize the form. To add a new field, go to the ‘Add Fields’ section in the left-hand panel. Then, just drag and drop any field to the form builder.
Here, we have added a ‘Name’ field to the form to capture the user’s name.

To customize a field, just click on it, and the left-hand panel will bring you to the ‘Field Options’ tab. There are three tabs that you can further configure: General, Advanced, and Smart Logic.
What you can customize varies by the field type. If you want to change the field label, insert descriptive text, or make the field required, then you will go to ‘General.’
Here, we’ve changed the ‘Home Value’ field label to ‘Property Price’ and added descriptive text for additional instructions. We’ve also made the field required so that users must insert this field to get their mortgage payment calculation.

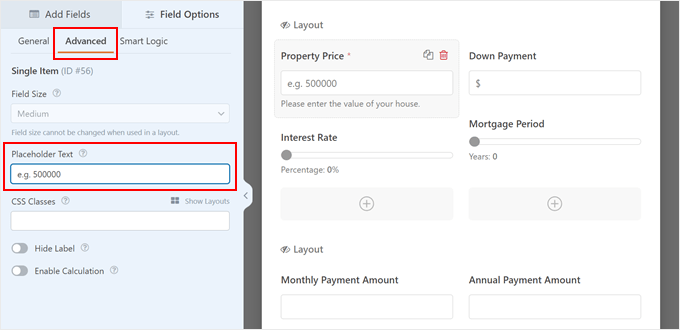
The ‘Advanced’ tab is where you can add placeholder text, specify the field’s CSS class if you want to use custom CSS, opt to hide the field label, and enable a calculation function if needed.
By default, the form has a ‘$’ sign as a placeholder to let users know that values should be in American dollars.
Alternatively, you can insert an example in the field label, like ‘e.g. 500,000,’ so the user knows how to insert the price correctly.
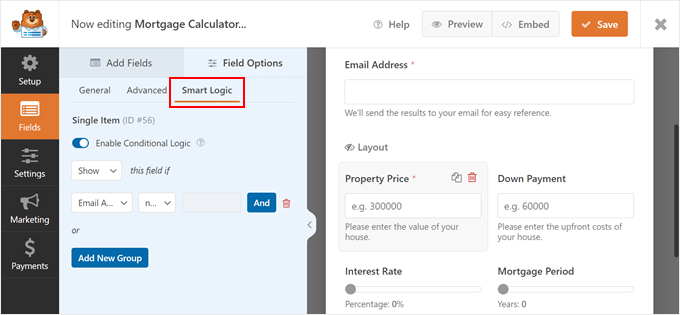
The ‘Smart Logic’ tab lets you enable conditional logic in the field. It’s optional, but it’s a good feature for making your mortgage calculator form more engaging.
To use it, just toggle on the ‘Enable conditional logic’ button.
Then, you can choose to show or hide the field based on certain criteria. In the example below, we have chosen to show the ‘Property Price’ field if the user has entered their email address.
Once you are done customizing the form, just click ‘Save’ at the top right corner.
Configure the Form’s Settings
Now, let’s go ahead and switch to the ‘Settings’ tab on the furthest left side of the menu.
In the ‘General’ tab, you can change the form’s name and insert a description at the top of the form. You can type in some instructions and call-to-action text to encourage users to fill out the form.
Additionally, you can customize the submit button’s text and button processing text.

You also want to switch to the ‘Spam Protection and Security’ tab.
WPForms already comes with anti-spam protection that’s enabled by default. But you can also activate Akismet for further protective measures.
Additionally, feel free to set a minimum number of seconds a user must spend before they can submit the form. This gives users enough time to fill out the form but not enough time for a spam bot to submit the form rapidly.

Scrolling down, you can also enable a country filter to allow users from certain countries to fill out the form. We recommend doing this if your real estate website only sells in a certain country.
Once you’ve toggled on the ‘Enable country filter’ button, just click ‘Allow’ below the Country Filter and select the country you sell to.
You can also customize the Country Filter Message if needed.

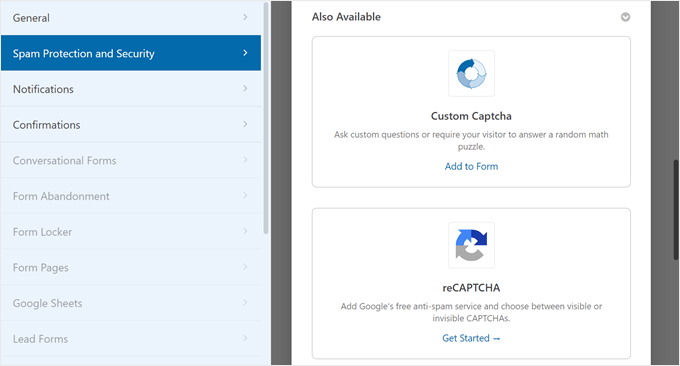
If you move down the page, you can also enable a CAPTCHA functionality to prevent spammy form submissions.
WPForms allows custom CAPTCHA, reCAPTCHA, and hCAPTCHA.
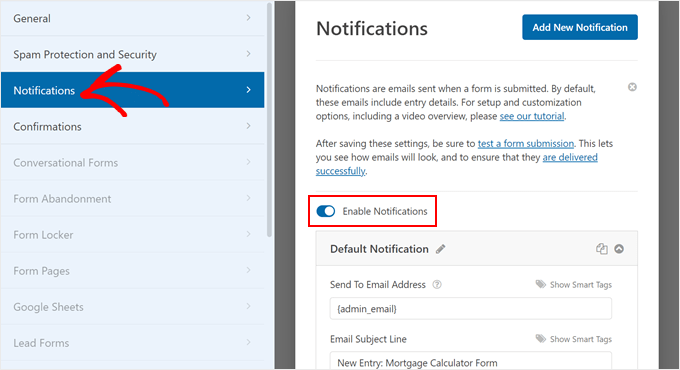
Let’s go ahead and move to the ‘Notifications’ tab. This is where you can send yourself an email every time there is a new form submission.
To enable this function, simply click ‘Enable Notifications.’ We also recommend using WP Mail SMTP to make sure you always receive these email notifications, as emails sent from WordPress are likely to get lost.
For more information on this, check out our guide on how to fix WordPress not sending email issue.
Feel free to edit the email content as needed.
You can also create a custom confirmation email to the user in these settings, too. To do this, you can follow our tutorial on how to send confirmation emails after WordPress form submission.
Like before, don’t forget to click ‘Save’ once you are done with the settings.
Embed the Mortgage Cost Calculator on Your WordPress Site
You are now ready to display the mortgage calculator form on your WordPress blog or website. What you need to do is click the ‘Embed’ button in the top menu.
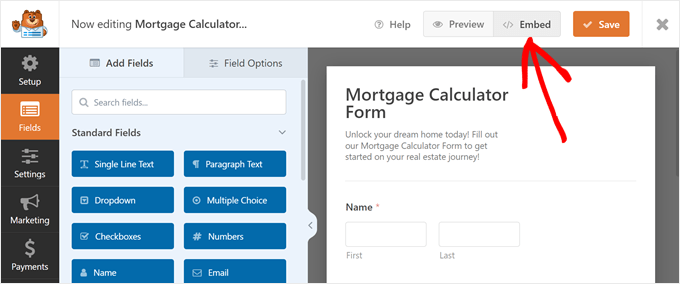
Now, an embed popup will appear, asking you to select an existing page or create a new one to add the form to.
Alternatively, you can also use a shortcode.
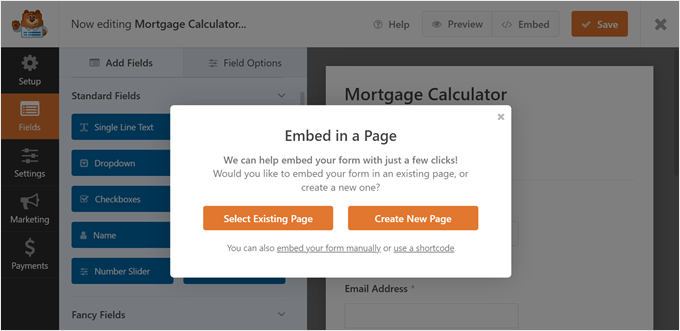
The process for adding the form to an existing or new page is pretty similar.
If you choose the ‘Select Existing Page’ option, then the next screen will ask you to choose a page to add the form to. After that, click ‘Let’s Go!’

If you choose the new page option, then the next screen will ask you to name this new page so that WPForms can create it for you.
Similar to the previous method, click ‘Let’s Go!’ to proceed.
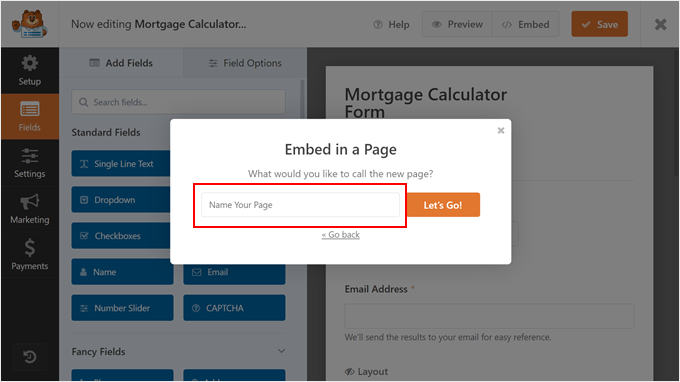
Both options will bring you to the Gutenberg block editor.
Now, go ahead and click the ‘+’ add block button anywhere on the page and select the WPForms block.

Once the block is there, open the ‘Select a Form’ dropdown menu.
After that, simply choose the form you created earlier.
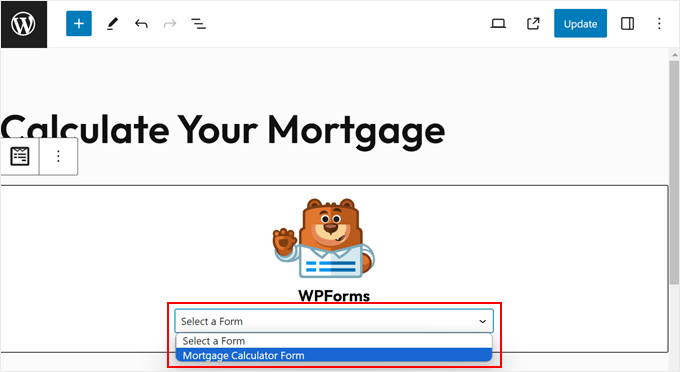
You will now see your newly created form displayed in the block editor.
In the Block settings sidebar, you can customize the form’s design further, like the background color and the field border. You can also click ‘Edit Form’ to go back to the WPForms builder if needed.
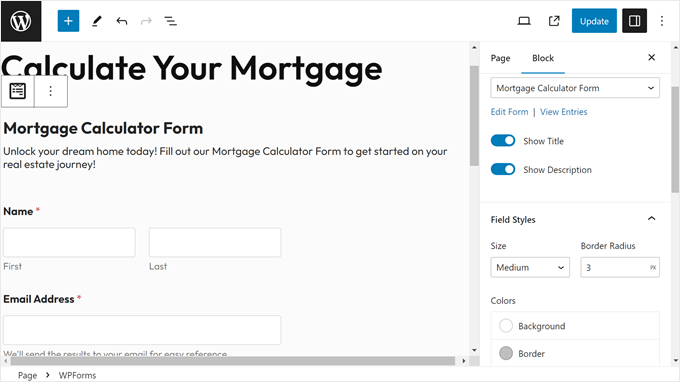
Once you are happy with how the form looks, just click ‘Update’ or ‘Publish’ to make the changes official.
Here’s what our mortgage calculator form looks like:
If you use a classic, non-block WordPress theme and want to display the form in a widget-ready area, like headers, footers, or sidebars, you can also do that.
Just go to Appearance » Widgets and click the ‘+’ add block button in any widget-ready area. Like before, add the WPForms block there and select the form you just created.
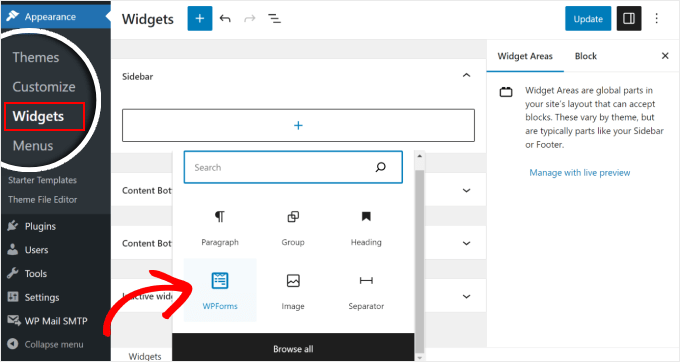
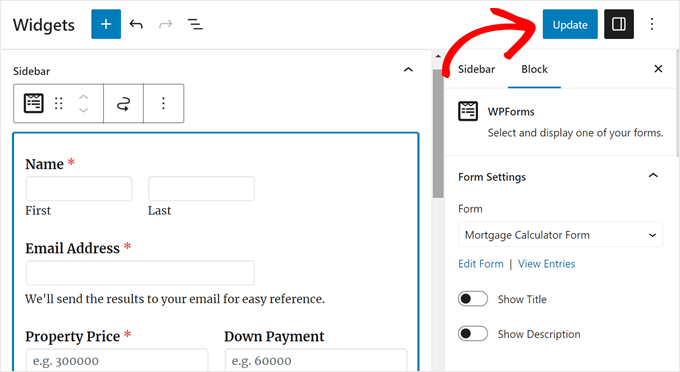
In the widget editor, you can also edit the block settings of the mortgage calculator widget, just like you would on the block editor.
Once you are satisfied with the form, simply click ‘Update.’
Alternatively, if the methods above don’t work, then you can use the shortcode method to insert the forms in pages, posts, and other template parts. Simply click the ‘use a shortcode’ link on the embed popup from earlier.
Then go ahead and copy the shortcode and paste it wherever you like.
For more information, read how to add a shortcode in WordPress.

Method 2: Add an Advanced WordPress Mortgage Calculator With Formidable Forms
This next method is excellent if you want to create an advanced WordPress mortgage calculator that takes into account your annual property taxes, insurance, and PMI (private mortgage insurance).
Once the form has that data, along with the user’s home price, loan amount, loan term, and interest rate, it can preview the user’s payment breakdown, which is also called the amortization schedule.
For this method, we will use the Formidable Forms plugin. This user-friendly WordPress contact form plugin comes with an advanced mortgage calculator template that you can add to your site.
The first thing you need to do is to install and activate both the Formidable Forms Lite and Formidable Forms premium (Business plan) plugins.
The free plugin has limited features, but Formidable Forms Pro uses it as the base for its more advanced features.
For detailed instructions, see our step-by-step guide on how to install a WordPress plugin.
Upon activation, go to Formidable » Global Settings in the WordPress dashboard. Here, you can click on ‘Connect an Account.’

On the next screen, simply log in to your Formidable Forms account.
You should have your account information after you purchase a plan.

You will now arrive at a page that asks for your permission to install Formidable Forms Pro.
Click ‘Connect and Install Formidable Forms Pro’ to activate your license key.
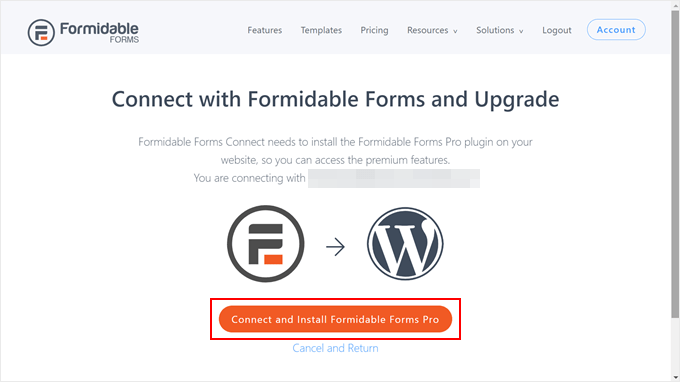
Now that you’ve successfully set up Formidable Forms, you are ready to add a mortgage calculator form to WordPress.
Use the Advanced Mortgage Calculator Form Template
To start, simply go to Formidable » Forms and then click on ‘Add New.’

A popup will now appear, showing all the ready-made templates that you can use on your WordPress website.
To find the mortgage calculation form template, just type in ‘Advanced Mortgage Calculator’ in the search bar. Then, hover your cursor over the template and click ‘Use Template.’

You will now arrive at the Formidable Forms builder. At this point, you can customize the form to match your needs.
To start, click on the field that you want to customize and then select the ‘Field Options’ tab.

From there, you can change the field label, choose whether the field is mandatory or optional, add placeholder text, and many other things.
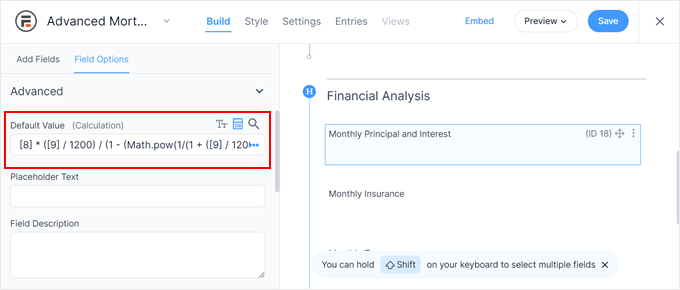
The cool thing about Formidable Forms is you can insert a default value in the calculator, allowing users to see what the calculation may look like later.

If you click on any of the fields in the ‘Financial Analysis’ section, then try to avoid changing any of the ‘Advanced Options.’
This area contains the calculation formulas, so changing them can completely break the mortgage calculator.
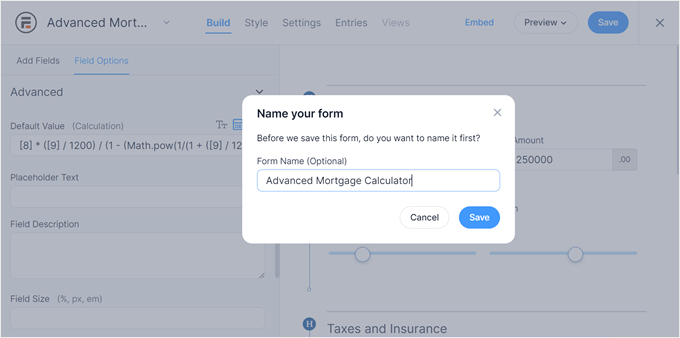
When you are happy with how the form looks, just click on ‘Save’ in the top right corner to save your changes.
After that, type in a name for your form so that you can easily identify it later. Then, click ‘Save.’
Customize the Style of the Mortgage Calculator Form
Let’s now switch to the ‘Style’ tab at the top menu. This is where you can choose a design for the form.
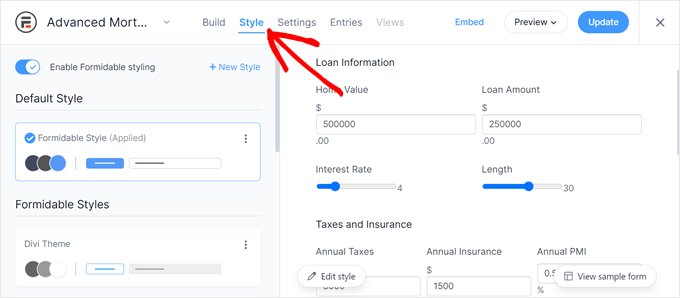
If you don’t like any of the styles, just click the ‘+ New Style’ button.
After that, a popup will appear. Simply write a name for this new style and click ‘Create new style.’

You will now be directed to a page where you can customize the design of the form style.
Feel free to modify the typography, color scheme, button styles, checkboxes, and so on.

Once you are satisfied with the design, just click the ‘Update’ button at the top right corner.
Configure the Formidable Forms Settings
At this stage, you can navigate to the ‘Settings’ menu at the top.
First, in the ‘General’ tab, you can customize the form title and description, as well as choose to display them on the website later. This may be a good place to insert some instructions on how to use the form.
Note that if you want to style the text, you need to use HTML.

Scrolling down, you will find a setting to enable Honeypot and JavaScript for spam prevention.
We recommend enabling them both to prevent fake and malicious spam entries.

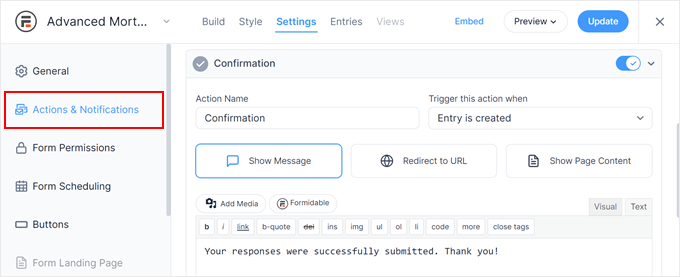
The ‘Actions & Notifications’ tab is where you can customize the confirmation email for the user.
You can either show a custom thank you message, redirect users to a specific URL, or send them to a different page.
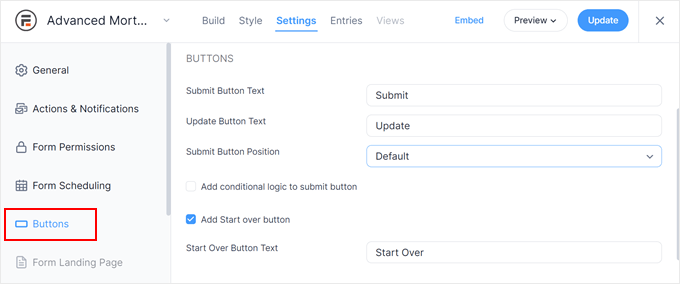
Another tab we recommend checking out is ‘Buttons.’
This is where you can customize the submit button text and position and even enable a ‘Start Over’ button in case the user wants to empty the form and start over.
After you have configured the form settings, just click the ‘Update’ button.
Embed the Advanced Mortgage Calculator Form on Your Website
Now that your advanced mortgage calculator form is ready, you can add it to any post, page, or widget-ready area of your WordPress theme.
To start, click the ‘Embed’ button in the top right corner.
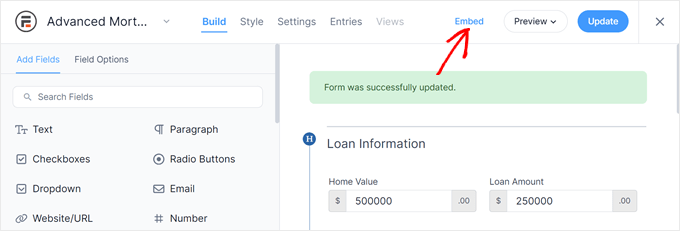
You will now see a popup that says you can add the form in three ways.
You can embed the form to an existing page, insert it into a new page, or use a shortcode.
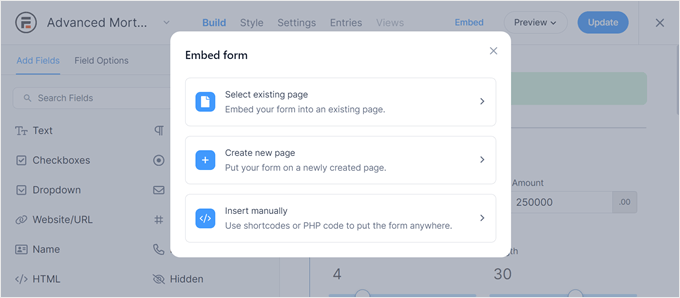
If you choose the existing page option, then you will select a page in the next screen.
Then, click ‘Insert form.’
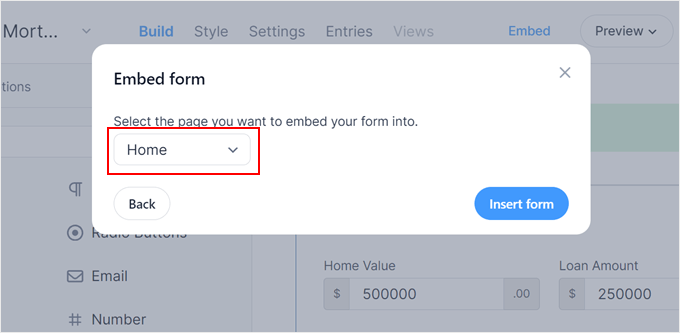
On the other hand, choosing the new page option will make you create and name a new page.
Once you do that, go ahead and click ‘Create page.’

With both options, Formidable Forms will automatically insert the form block in the page’s block editor. All you need to do is rearrange it.
If you need to edit the form right from the block editor, just open the block’s settings sidebar and click ‘Go to form.’

When you are ready, either click on ‘Publish’ or ‘Update.’
Here’s what our Formidable Forms mortgage calculator form looks like:
Alternatively, you can add the mortgage calculator using a shortcode or PHP code.
In the embed popup from earlier, click ‘Insert manually.’
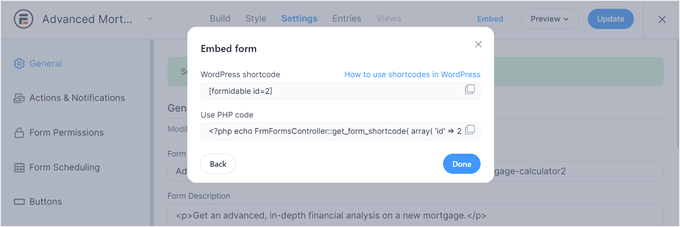
Then, you can copy either the shortcode or the PHP code. Again, for the first option, you can read our article on how to add a shortcode in WordPress.
As for the PHP code, we only recommend using it if you are comfortable with working with code snippets. We recommend using WPCode for this, as this plugin makes it safe and easy to insert code in WordPress.

For more information, you can read our guide on how to insert code snippets in WordPress.
We hope this article helped you learn how to add a mortgage calculator in WordPress. You may also want to see our article on how to create an auto loan or car payment calculator in WordPress and our expert pick of the best email marketing services for small businesses.
If you liked this article, then please subscribe to our YouTube Channel for WordPress video tutorials. You can also find us on Twitter and Facebook.


